Garden to table: Nixtamal Cherokee White Eagle Corn Tortilla
A recipe to turn the joy of growing heirloom dent corn into tortilla for tacos, quesadilla, chips, etc.
Over a thousand year of cultivation
In addition to the neat appearance and coloration, heirloom corn have historical, geographical, and cultural significance. These heirloom varieties developed hundreds of years ago (and longer) became a vital food source for the indigenous people of the Americas.
Nixtamalization
One of the special qualities of corn is that it is a grain. Corn is grown with surplus in mind; it is then dried and stored to be consumed during the non growing season or times of lean harvests. Dent corn varieties with their starchy qualities are the most ideal type of corn to use as grain. Without machinery, turning this hard grain into an ingredient can take enormous amounts of labor. Nixtamalization was discovered as a process to make corn easier to work with. Developed over 1500 years ago in Mesoamerica, nixtamalization is a process of rehydrating corn in an alkaline solution. This process of rehydrating corn loosens and softens the tough hull and germ. Thus the corn becomes softer and easier to grind. More importantly, it makes corn more nutritious while also removing toxins from mold that may have grown during the storage of this grain. [Source: Wikipedia]
In this recipe, you will be making tortilla from nixtamal masa. (Masa is a dough made from ground dried corn. Nixtamal masa is masa made from nixtamalized dried corn.)
Recipe
Makes about twelve 5-inch tortillas.
Ingredients
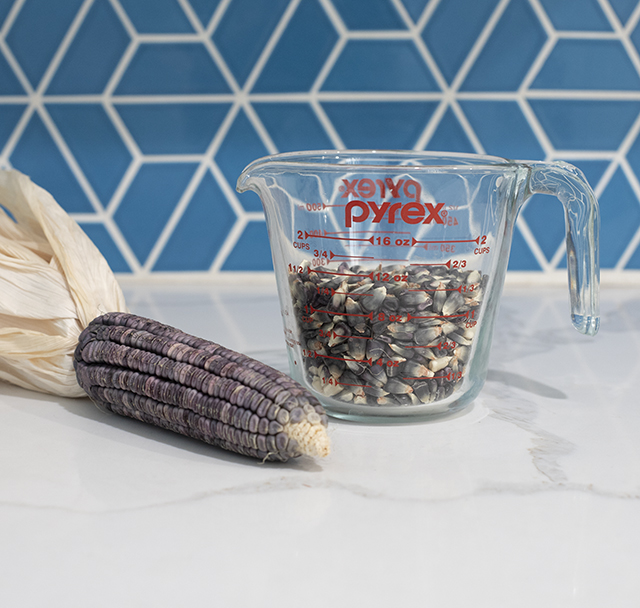
- 1.5 cup dried dent corn (~two 6-inch ears of ‘Cherokee White Eagle’ corn. )
- 1 tablespoon pickling lime (also known as calcium hydroxide)
- water
- salt
yields about 1.5 cups
Turning dried corn to nixtamal masa to tortilla is a two day process. Recommended equipment: a food mill capable of making masa (or food processor,) cast iron skillet or carbon steel pan, 8 quart pot, colander, shallow bowl, wax paper, two small cutting boards (or a tortilla press.)
Nixtamal masa
Simmer and Steep
Fill an 8 quart enameled or stainless steel (non reactive) pot a little more than half way with water, add 1 tablespoon of pickling lime, and bring to a boil. Add corn and let boil for about a minute before reducing to a simmer. Simmer for 15-30 minutes. Remove from heat and allow the corn to steep overnight (12 hours.) The alkaline solution will soften the hard outer hull (pericarp) and give it a membrane like characteristic. While the solution is safe to handle, do note that it is caustic to some degree. Handle with care until you know your tolerances.
(Product not endorsed by NeverEnoughDirt)
Rinse and Clean
Next day, drain and rinse corn in a colander. At this point the membrane, tip cap, and germ can be removed from the kernel. This is done by rubbing hands against the corn and removing individually. This is necessary for recipes that call for a very smooth masa; like tamale. For our tortilla, a little bit of grit gives it great texture. It therefore will not be necessary to remove everything entirely.
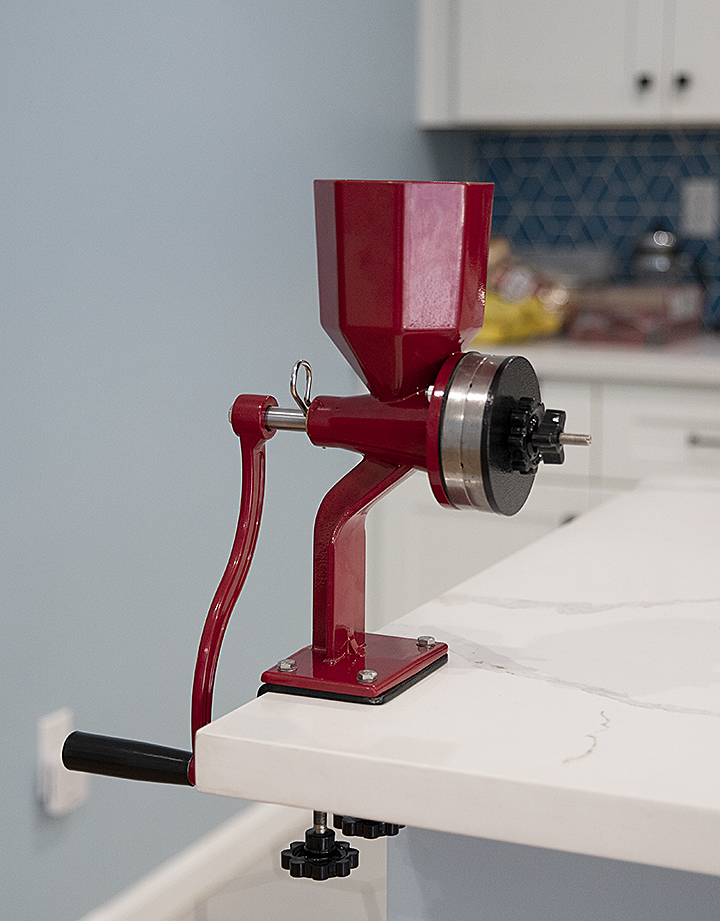
Mill and Dough
The next step is milling the nixtamal into nixtamal masa. Feed the masa mill a little bit at a time (less than a handful) and mill at the finest setting. Adding a tablespoon of water during the milling can help. Experiment with adding some water here and there to find what works best. A food processor is an alternative. Work in small batches and experiment with adding water.
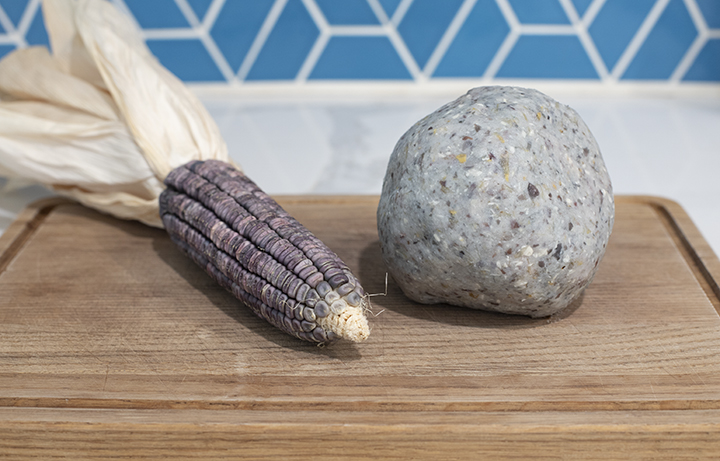
Once all the nixtamal has been milled, add a couple of pinches of salt and knead the loose nixtamal. Add a little water at a time until it comes together into a large ball. When the dough is too dry, it will not stay together. When it is too wet, your hand will be sticky with nixtamal. An ideal ball of nixtamal masa will not leave your hands wet like you just washed them.
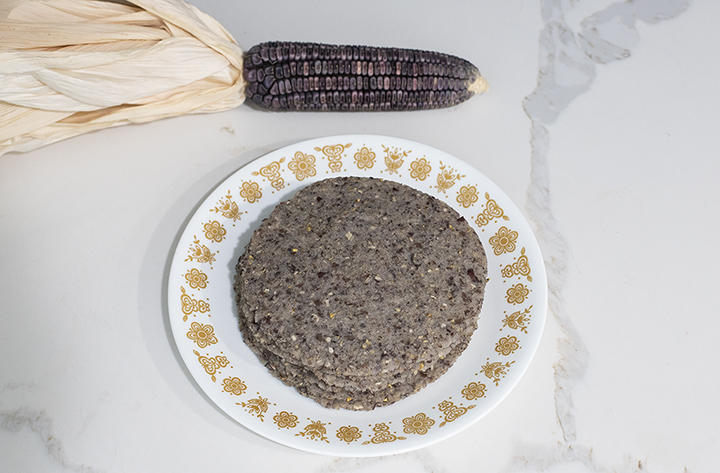
Making tortilla
Allow the masa to rest for about 15 minutes. 5-inch tortillas are easiest to work with. Shape a ball about the size of an extra large meat ball. Place one sheet of wax paper over a medium cutting board. Place the dough ball in the center of the wax paper. Then lay (on center) a sheet of wax paper on top. Using another cutting board, place it center over the dough ball and press straight down.
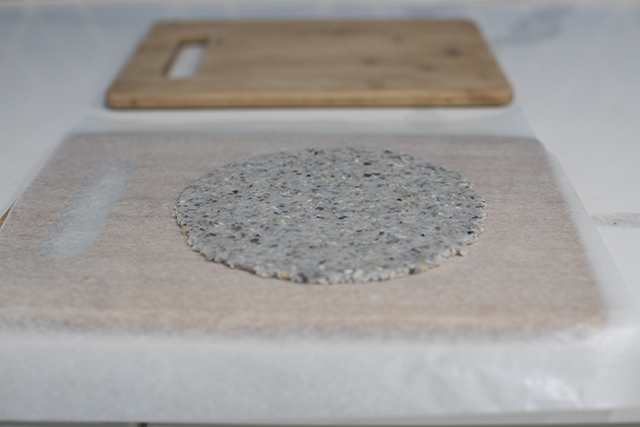
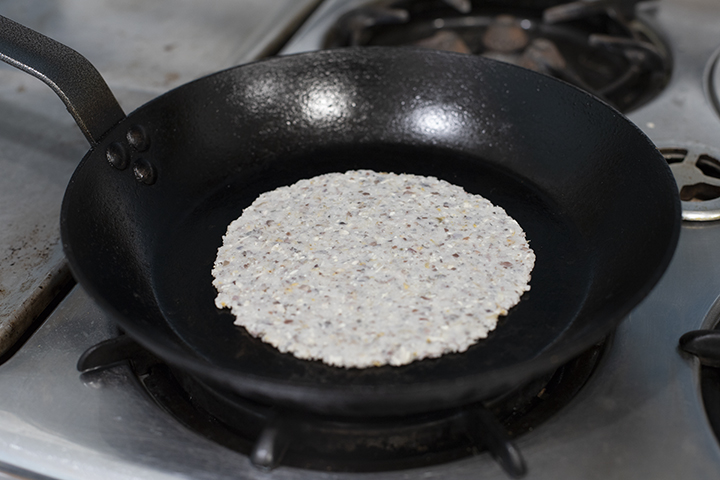
When the desired thickness is reached, set aside the top cutting board. Slowly peel away the top off the wax paper sandwich. Then gently place the wax paper back on top of the tortilla. Grab the bottom wax paper, flip it over and gently peel the wax paper away. Transfer the tortilla onto the palm of your hand. Finally, transfer the tortilla onto a heated pan. Carbon steel pans or cast iron skillets work best. Cook until one side is slightly toast before flipping it over and cooking the other side.
Finished tortillas are great as snacks, quesadilla, tacos, and even fried up as chips.
Recipe notes: This particular garden to table combines an ancient corn processing technique developed over 1500 years ago in Mesoamerica with a variety of corn that was developed in North America.
Brian Truong is a kitchen garden cook. He enjoys cultivating historically and culturally significant ingredients for a garden to table experience. See what he is up to on Instagram and on YouTube @neverenoughdirt and also at https://neverenoughdirt.com